Tip: If there is not enough room on the status bar to display the mouse coordinates, clear the Display Map Scale check box and/or the Display Map Width check box to make more room.
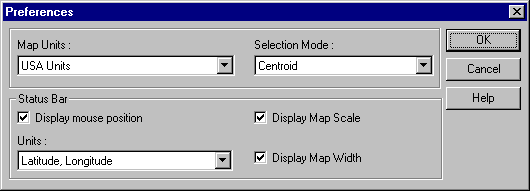
You can use the Preferences dialog box to customize the selection mode and the status bar. You can also use the Preferences dialog box to specify the selection mode. (For more information, see Specifying the selection mode.)
The preferences you specify are stored with your copy of Autodesk MapGuide Viewer, so all maps you view will use these settings, and you do not need to set preferences for every map. Note, however, that some of these settings can be controlled by API methods, so an application developer may have changed one or more of these settings. If a map author created a map without a status bar, the status bar preferences you specified are ignored when you display that map.
If the current map was published without a HELP > PREFERENCES command on the popup menu, you will not be able to set preferences while viewing this map. Instead, view a map that does contain the HELP > PREFERENCES command, and then set the preferences.

Tip: If there is not enough room on the status bar to display the mouse coordinates, clear the Display Map Scale check box and/or the Display Map Width check box to make more room.